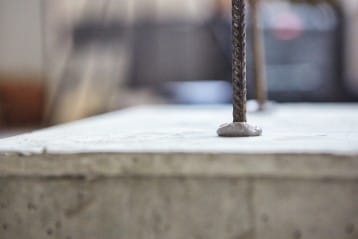

Following the methodology and employing the right tools makes rebar installation far safer. Staying in line with instructions around positioning, embedment depth, mortar volume and hole cleaning ensures ultimate performance of every design. Likewise, using the right Hilti products can make the process stress free, eliminating steps and removing the potential for error throughout the key steps of positioning, drilling, cleaning, injecting and inserting.
Before we look at each aspect of the installation process, the first step is to ensure you're adequately protected while handling chemicals and generating dust. Make sure to follow the health and safety warnings in the equipment manual, safety data sheet, and on the labels.
Step one: Positioning
Respecting the limits of edge distance and spacing are key to avoiding failure. Positioning your hole too close to the edge means the concrete will split as soon as any tension is applied to the rebar. It's also essential to avoid objects embedded in the existing concrete, whether they're cast-in rebar, live wire or post-tension cables. Hilti offers a range of scanning systems for detecting objects in cured concrete.
Step two: Drilling
There are two methods to drilling for optimal performance. Hammer drilling with a standard drill bit (such as the ultimate SDS plus TE-CX bit) and following the regular blow and brush procedures for cleaning will provide surfaces rough enough for the mortar to bond with. However, you can also use a hollow drill bit (like the SDS max TE-YD or SDS plus TE-CD) which allows dustless hole creation as drilling and cleaning are combined into a single step. Alternatively, you can use a diamond core bit (for example, the DD-C T4) along with a roughening tool (TE-YRT) which offers a similar level of performance as the hammer drilling method.
Step three: Cleaning
Without proper cleaning, dust will build up in the uneven surface inside the hole. This means that when the adhesive is injected, it will stick to the topmost layer of dust rather than bond with the cured concrete. In this scenario, residual bond strength is effectively zero. In hammer drilling applications, you're required to cycle through blowing and brushing steps to remove excess dust. This is the same whether you are cleaning manually or with compressed air.
Using the aforementioned TE-YD or TE-CD hollow drill bits allow you to clean as you go. You can also keep your work site clean by using the hollow drill bits in conjunction with the VC 40-U=Y wet dry vacuum. Utilising these dustless methods allows you to complete installation in half the time. If you're using a diamond core bit and the roughening tool, you'll be able to reduce the time spent flushing, brushing and blowing to remove dust.
Step four: Injecting
The first thing to remember at this stage of installation is that you should use qualified products only. Different applications require different mortar, so it's absolutely essential to use the approved product for the task at hand. Be sure to follow the mortar's IFU (instructions for use) and discard a small initial quantity.
Following the IFU will help you to avoid creating air bubbles or distributing the mortar unevenly. Making either one of these errors will result in failed design. Full PDF downloads are available for all qualified Hilti products on their respective pages of our website. Chemical distribution can be difficult in overhead or deep embedment applications, but the easiest way to guarantee even distribution is to take advantage of Hilti's injection system. This comprises of a piston plug connected to a hose that's attached to the end of your chemical dispenser. The plug is pushed to the end of the hole and back pressure from chemical injection moves the piston slowly along the required depth.
Step five: Inserting
Once your rebar has been inserted, avoid touching it until the mortar has dried. Curing time will be outlined in the product manual, but note that it largely depends on the conditions you're working in. Slow curing mortars like HIT-RE 500 V3 are better suited to hotter environments and deeper holes, while faster curing mortars such as HIT-HY 200 are preferable in colder climates or shallower holes. In overhead applications, you can use dripping cups to catch excess chemicals, and a wedge to hold rebar in place during the curing process.
For more information on post-installed rebar applications, head over to Ask Hilti where you'll find a community of engineers available for guidance and discussion.

